Monday, December 17, 2012

CQF Month 7 - January 2013 - Respectible


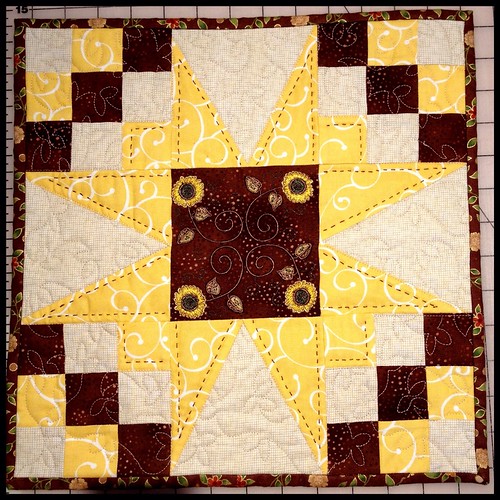
General Description of Block:  This one will surprise you when it replecates.  The dominant red cross and Jacob's Ladder-esque center dissappear. 

 
Well, the red cross doesn't, but I am thinking that once we scrap-o-late it it will.   (Like that word?  I just made it up.)  What I see is a respectible arrangment of traditional pieced shapes culminating in big bulls eyes.
 
This is a nine patch block, constructed from nine 5 nine patch blocks and 4 squares in a square.
 
 
FQG:  Your kit contains fabric for the black pieces.  Where you see red in my directions substitute any color other than black, or white that you find in the kit fabric.  Where you see white, use white.  Where you see beige use a low volume (LV) or  text print.
 
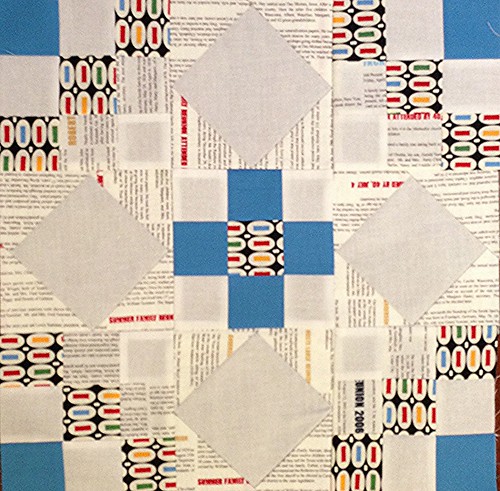
"Low volume" is a trending phrase at the moment.    At it's simplest, it refers to fabric that is neutral (white, beige, or grey) with a graphic print on it.   Any of the fabrics in the photo below would be an example. 
   
Low Volume Fabrics
 
For our purposes please select a LV fabric that coordinates with the colors in the kit fabric.


Cutting Directions: (61 pieces, but some will be strip pieced to make it easier.)
  • White
    •  3, 2" x 8" rectangles
    • 4, 2" x 2" squares
    • 4, 5" x 5" squares
  • Red
    • 4, 2" x 2" squares
    • 1, 2" x 8" rectangle 
  • Black (Kit fabric)
    • 3, 2" x 8" rectangles
    • 1, 2" x 2" square
  • Beige (LV)
    • 2, 2" x 8" rectangles
    • 16, 2 3/4" x 2 3/4" squares
Sewing Directions:


Center:

 
  • Gather all little squares
    • 4 white,
    • 4 red
    • 1 black
  • Sew 3 sets of 3
    • 2 - white, red, white
    • 1 - red, black, red
  • Iron seam allowances towards the red.
  • Assembles resulting rectangles to make one square as pictured above.
  • Trim to 5" x 5" square
 
Corners:

 
  • Gather all rectangular pieces
    • 1 red
    • 3 white
    • 3 black
    • 2 beige (LV)
  • Sew 3 sets of  3
    • 1 - red, white, black
    • 1 - white, black,  beige (LV)
    • 1 - black, beige (LV), white
  • Iron seam allowances towards the black.  Where black is on the outside edge of the set iron both seam allowances away from the center strip.
  • Cut each set into 4, 2" x 5" rectangles
  • Assemble pieces to make 4 identical squares as pictures above.
  • Trim each square to 5" x 5"
 
Edges:


  • Gather
    • 16, beige (LV) squares
    • 4, white squares
  • Draw one diagonal line on the wrong side of each beige (LV) square.  This is your sewing line.
  • Progressing one corner at a time
    • Aline one beige (LV) square, right sides together, with the corner of a white square so that the drawn line is parallel to the corner.
    • Sew on line.
    • Pressing from the top of your piece, press the beige (LV) square in half towards the outer corner. (There will be 3 pieces of fabric there, leave it that way)
    • Repete 3 times to make 4 white squares with one beige (LV) corner.
    • Repete process with adjacent corner, 4 times to make 4 white squares with 2 beige (LV) corners.
    • Repete process with adjacent corner, 4 times again to make 4 white squares with 3 beige (LV) corners.
    • Repete process with remaining corner, 4 times to make 4 white squares with 4 beige (LV) corners.
    • Trim each square to 5" x 5"
Assemble Block:

Respectable

 
  • Use the picture above to position pieces
  • Iron seam allowances towards the 9 patches.
  • When you assemble the whole block you will need to clip the seam allowances to allow them to lie toward the 9 patch blocks exclusively.  Proceeding in this manner allows you to minimize the amount of bulk in any one spot.
 
This is sort of what it will look like - only more colorful.  the +s and blocks will be all different colors.
 The stars show up better in person than in my photo
 
Bring your completed block(s) to the January metting of the Frisco Quilt Guild, (Tuesday January 22, 2013) to be eligible for the drawing.

I can't wait to see how this one turns out.

Tuesday, December 4, 2012

Gentle Purple Reminder


Hello all...how is the Ho, Ho, Ho-ing going?!

I have 11 kits left this month.  That means that there are 19 kits at large amongst our members, 19 opportunities to win a stack of lovely purple blocks, 33" of  wof yardage, 11 kits, and one coupon for free edge to edge quilting from Tops to Treasures.

Remember you have to bring a completed block to our next guild meeting to be eligible to win and that meeting is earlier than normal this month.

You need to finish your block by 6:30 pm, Tuesday, December 18, 2012!

Wednesday, November 28, 2012

And the winner is.....


Peggy Woodside
 
 
Congratulations to Peggy on winning last night!
 
Her winnings included:
 18 completed blocks,
 9 unfinished kits,
 uncut yardage of the blue leaf print,
 and a coupon for free quilting from Tops to Treasures
 
Of the kits cut and distributed there are only 3 missing.  I am impressed.  Well done Frisco Quilt Guild.  If you happen to come across one of these 3 lost blocks please send them on the way to Peggy.

Monday, November 26, 2012

CQF Month 6 - December 2012 - Friendship Circle


General Description of Block:  The focal point of this block is the Friendship Star that sits at it's center.  The star is surrounded by nine patch blocks that when set with other of Circle of Quilty Friends blocks create the illusion of large circles on the quilt.  This block also creates a fun ribbon like look when paired with others like it.  It follows a nine patch construction throughout.

FQG:  Your kit contains fabric for the lavender corners.  You need to add coordinating fabric to make the block.  Please position dark purple fabric in the 13 dark purple blocks and golden/orange blocks in the 12 golden blocks as shown in the picture above.  The background is white.  The star made from the HSTs can be any coordinating color as long as it shows up.

Cutting Directions:  (53 pieces, but some will be strip pieced to make it easier.)
  • Background
    • 2, 5 5/8" x 5 5/8" squares
    • 1, 2" x 8" rectangle
    • 4, 2" x 2" squares
  • Star points
    • 2, 5 5/8" x 5 5/8" squares
  • Gold
    • 2, 2" x 8" rectangles
    • 4, 2" x 2" squares
  • Dark Purple
    • 3, 2" x 8" rectangles
    • 1, 2" x 2" square
  • "Lavender" (FQG kit fabric)
    • 1, 2" x 8" rectangle
    • 1, 3 1/2" x 8" rectangle
Sewing Directions:

  • Edges
    • Gather 2 background and 2 Star Point big squares
    • Draw a line diagonally across the back of each background square.
    • Layer background square with star point square, right sides together
    • Sew 1/4" on either side of drawn line.
    • Iron
    • Cut on drawn line
    • Iron seam allowances toward the star point sides
    • Trim to 5" x 5" squares
    • You should now  have 4, 5" hst blocks
 

  • Corners
    • Gather all rectangle pieces
      • 1 background
      • 2 gold
      • 3 dark purple
      • 2 "lavender"
    • Sew three sets
      • dark purple, gold, background
      • skinny strip "lavender", dark purple, gold
      • fat strip "lavender", dark purple
    • Iron seam allowances toward the center in the set where dark purple is in the center.
    • Iron seam allowances toward the outside in the sets where dark purple is on the edge.
    • Cut each set into 4, 2" x 5" rectangles
    • Assemble pieces to make 4 identical squares as pictured above.
    • Trim to 5" x 5" squares


  • Center
    • Gather all  little squares
      • 4 background
      • 4 gold
      • 1 dark purple
    • Sew three sets
      • 2 - background, gold, background
      • 1- gold, dark purple, gold
    • Iron seam allowances towards the gold.
    • Assemble rectangles to make one square as pictured above.
    • Trim to 5" x 5" square

Assemble Block:
  • Use the picture above to position pieces
  • Iron seam allowances toward hsts.
Bring your block(s) to the December meeting (Tuesday, December 18) of the Frisco Quilt Guild to be eligible for the drawing.

The winner of the drawing will receive all of the blocks submitted, left over and unfinished kits, any yardage that remains from making the kits, and a coupon for free labor from Tops to Treasures.

The finished quilt will look something like this....


... see the ribbons?  

Tuesday, November 13, 2012

Bring on the purples!


Dear Frisco Quilt Guild members,

This is the fabric that will be featured in the kit next month.

It is from Ty Pennington's Impressions collection. 
 
I hope you like it as much as I do.
 
 
PS  As of today you have two weeks to finish your Pow Wow blocks.

Wednesday, October 24, 2012

And the Winner is.....


Hilma Diaz!
 
 
Hilma won 4 blocks (really gang?! What happened this month?) 12 unfinished kits, 1 candy charm pack of Cuzco by Kate Spain, and a coupon to Tops to Treasures for free quilting for any one edge to edge design.
 
Those of you who still have kits and/or unfinished blocks please forward them to Hilma at your earliest convenience.  She is going to make a beautiful quilt with them.

Tuesday, October 23, 2012

CQF Month 5 - November 2012 - Pow Wow

 
I can't help myself. Every November I think of the same things.

I'm about 7 years old, sitting in my 2nd grade classroom, the trees are near bear and there are crunchy leaves all over the ground, and I listen to the teacher talk about the very first Thanksgiving. Some of us have on paper colars over plain shirts, some have construction paper feathers stuck on our heads, and all of us are thinking, "Wouldn't it be neat to meet a real Indian and have dinner together."

There weren't many in New Jersey 40 years ago. I don't imagine that there are many there now.   We did have neighbors though and a good neighbor with which to share a feast is a grand thing.  I am Thankful for the provisions of God through good neighbors and bountiful harvests throughout the ages. 

General Description of Block:  Pow Wow reminds me of patterns I've seen on old indian blankets.  It is a 9 patch block featuring smaller 9 patches cornering an eight pointed star that seems to explode from the center.

FQG:  Your kit contains fabric for the light blue in the corners and center.  You need to add coordinating fabrics for the rest of the block.  Let's try to position the colors like they are in the picture above.

Cutting Directions: (53 pieces, but some will be strip pieced to make it easier.)

  • Blue  (FQG Kit fabric)
    • 1, 5" x 5" square (FQG - has been cut to size for kit)
    • 3, 2" x 8" rectangles (FQG - cut from large rectangle in kit.)
  • Green
    • 2, 2" x 8" rectangles
  • Gold
    • 2, 2" x 8" rectangles
    • 1, 6 1/4" x 6 1/4 square
      • sub-cut twice on the diagonal to make 4 small triangles
  • Brown
    • 1, 2" x 8" rectangle
    • 2, 6 1/4" x 6 1/4" square
      • sub-cut each square twice on the diagonal to make 8 small triangles
  • Red
    • 1, 2" x 8" rectangle
    • 1, 6 1/4" x 6 1/4" square
      • sub-cut twice on the diagonal to make 4 small triangles
 
Piecing Directions:

  • Corners:
    • Gather
      • 9, 2" x 8" rectangles
    • Sew strip sets:
      • blue, green, brown
      • gold, blue, green
      • red, gold, blue
    • Iron seam allowances
      • towards the center when the center strip is blue
      • away from the center when blue is on the end.
    • Cut each strip set into 4, 2" x width of set segments
    • Sew one segment from each set together along the long edge to make one 5" square.  It should look like the picture at the beginning of this section.
    • Iron seam allowances away from the center
    • Trim block to 5" x 5" square
    • Repete 3 times to make 4 identical blocks.
 
  • Edges:
    • Gather
      • 16 small triangles
    • Sew 4 pair red/brown triangles ,
      • Sewing from the right angle toward the point with the brown triangle on the bottom.
      • Sew one brown and one red small triangle together along the short side.
      • Iron seam allowance toward the brown triangle.
      • Repeat 3 times for 4  large red and brown triangles
    • Sew 4 pair gold/brown triangles
      • Sewing from the right angle toward the point with the brown tirangle on the bottom.
      • Sew one brown and one gold small triangle together along the short side.
      • Iron seam allowance toward the brown triangle.
      • Repeat 3 tims for 4 large gold and brown triangles.
    • Sew red/brown triangle to gold/brown triangle along the hypotenuse
      • be careful not to stretch the pieces
      • snuggle seams together at center.
      • Pop center seam and iron seam allowances in a swirl.
      • Repeat 3 times for 4 squares
    • Trim blocks to 5" x 5" square
 
  • Assemble block:
    • Iron seam allowances toward edges made from triangles.

Bring your finished block(s) to the November meeting of the Frisco Quilt Guild to be eligible for the drawing.

The winner of the drawing will receive all of the blocks submitted and be able to make a quilt that looks something like these....


      I like it!  Maybe I will salt the ballot box this month....just kidding!


Monday, October 15, 2012

A gentle reminder....


You have one week to get your block finished so you can bring it to the October general meeting of the Frisco Quilt Guild and win the bunch.

My block is ready....is yours?

Wednesday, September 26, 2012

And the winner is.....

The winner of the September 25, 2012 Frisco Quilt Guild block of the month lotto is

Ginny Miller
Ginny won 14 completed blocks, 5 kits (returned from players who didn't get to it. Well done on that people! I am proud of you), and 2 IOU blocks (completed but not turned in).
As there was no fabric left over I threw in an extra surprise.....
 
 
....a one block mini. I had to figure out how to make the block, didn't I. Well, this was my test block, embellished with some machine embroidery, and hand quilting.

Ginny also received a coupon good for free labor from Tops to Treasures on any quilt with edge to edge quilting.

~*~*~*~*~*~*~*~*~*~*~*~*~*~*~*~*~*~*~*~*~*~*~*~*~*~*~*~*~*~*~*~*~*~*~*~*~*~*~*~*~*~*~*~*~*~*~*~

In other news check out these items from last night's show and tell.

 
December 2011 lotto winner Vicky Shortino had this to share. I love the throw made from Dancing Tulips.

 
March 2012 winner Marilyn Pitrone had a finished Brain Dead quilt to show us. (This photo is from its time with me getting quilted.)

It was awesome seeing my their quilts finished.

Monday, September 24, 2012

CQF Month 4 - October 2012 - Woven Together


General Description of Block: Woven Together is a 9 patch block which features 4 accent fabrics strategically placed to create the illusion of ribbons woven together.

FQG: You kit contains fabric for the purple in the corners.  You need to add white for the background, and 4 additional fabrics that coordinate for the "ribbons".  Please steer clear of the dark shade that is the background of our kit fabric.


Cutting Directions: (52 pieces, but some will be strip pieced to make it easier.)

From background: (white)
  • For corner blocks
    • 1, 3 3/4" x 8" strip
    • 3 2" x 8" strips
  • For edge blocks
    • 1, 6 1/4" x 6 1/4" square
      • Sub-cut twice on the diagonal creating 4 small triangles
From Purple (kit)
  • For corner blocks
    • 3, 2" x 8" strips
From accent fabrics: You need the same pieces from each of 4 different fabrics
  • For corner blocks - cut one from each of 4 different fabrics
    • 1, 2" x 2" square
  • For edge blocks - cut one from each of 4 different fabrics
    • 1, 6 1/4" x 6 1/4" square
      • Sub-cut once on the diagonal, creating 2 large triangles
      • Sub-cut one of 2 large triangles once on the diagonal to create 2 small triangles
      • You now have 1 large triangle and 2 small triangles
  • For center block
    • Take one small triangle from edge cuttings.


Piecing Directions:  It is very easy to get the pieces of this block in the wrong place.  Be alert!  If possible set the pieces out in front of you as you put them together.

Corners:
  • Sew strip sets:
    • Wide white strip + purple strip along long edge
    • White strip + purple strip + white strip along long edge
    • White strip + purple strip
  • Iron seam allowances toward purple side
  • Cut each strip set into 4, 2" x width of set segments
  • Sew 2" x 2" accent squares to white edge of purple square, white square segment
  • Iron seam allowances toward accent fabric
  • Sew strip sets together along long edges to make 4 corner blocks.  They will each have a different color in one corner.
  • Iron seam allowances away from center.
  • Trim blocks to 5" x 5" squares.
Edges:  The placement of colors in these pieces will set the placement for the rest of the block.  Be alert! or prepared to rip.

  • Sew small white triangles to small accent triangles  (you will have one small accent triangle of each color remaining after this step) making sure that the white triangle opens to the right side of the right angle.
  • Iron seam allowances open.
  • Aligning right angles, sew large accent triangles to hypotenuse of small triangle sets.
  • Iron seam allowance toward the large triangles.
  • Trim blocks to 5" x 5" squares.
Center:  Even here it is very easy to get the pieces in the wrong place.  (Ask me how I know!)  Keep your wits about you.  Be alert!
  • Take remaining 4 small accent triangles
  • Sew together 2 sets of 2 making 2 large triangles
  • Iron seam allowances to one side.
  • Sew 2 large triangles together along the hypotenuses to make one large square.
  • Trim block to 5" x 5" square.


Assemble Block:
  • Arrange blocks  in front of you so that the colors match up.


FQG: I am making kits for this quilt from remnants of a Moda Bake Shop project.  I think you are going to like it.  Kate Spain, Cuzco is wonderfully bright and fun.   Once the kits are distributed there will be no more fabric until it is released by Moda and arrives in quilt shops in October.

If you want to participate in this round of our Block of the month program I suggest that you pick up your kit at the beginning of our meeting on September 25th.  (There will be 29 kits available - 30 blocks for the winner, including my sample block.)

The winner of the blocks will be able to make a quilt that looks something like this one.....


.....only much prettier!  Think  jolly rancher candies brights paired with white and navy/deep purple.  You are going to want to win!!

Tuesday, September 11, 2012

Wow!


We had an unprecedented response to this block!  All of the kits were taken at our meeting in August.  That is 30 kits! 

There was no fabric left over from the kits....so I'll have to think up a fun extra to put in with the prize package...hmmmm.

If you took a kit please remember to make it...or bring it back at our next meeting.  I can't wait  to see all of the beautiful sunflowers.

Remember, all of the blocks go to one winner....someone is going to have a beautiful quilt.

Wednesday, August 29, 2012

And the winner is.....


Holly Stephens!
 
 
Congratulations Holly.  She won 10 finished blocks, 17 kits, and free edge to edge quilting on one top from Tops to Treasures.  I can't wait to see this beauty!


Monday, August 27, 2012

CQF month 3 - September 2012 - Sun Flowers


General Description of Block:  This nine patch block is made from two sets of four identical blocks, (one on the corners, and one of the edges) with a third block in the center.  It makes me think of a glorious field of sunflowers when there are several blocks together.

FQG: Your block contains fabric for the brown in the corners.  You need to add the brown center, yellow, and off white background.


Cutting Directions: (49 pieces, but some will be strip pieced to make it easier.)

  • From background (off white)
    • cut 3, 2" x 8 1/4" rectangles
    • cut 4, 5" x 5" squares
  • From brown
    • cut 3, 2" x 8 1/4" rectangles (FQG Kit fabric)
    • cut 1, 5" x 5" square (center block)
  • From yellow
    • cut 3, 2" x 8 1/4" rectangles
    • cut 4, 4" x 6" rectangles
Piecing Directions:
Corners: Make 4 identical blocks


  • Gather 9, 2" x 8 1/4" rectangles (3 yellow, 3 brown, and 3 off white)
  • Sew 3 sets in the following orders:
    • brown, yellow, off white
    • off white, brown, yellow
    • yellow, off white, brown
  • Iron seams away from the brown.  On sets where brown is on the outside iron both seams towards the inside.
  • Cut sets, perpendicular to the seams, into 4, 2" x 5" strips.
  • Sew long edges of strips together, with the center blocks arranged yellow, brown, off white.
  • Iron seams towards outside.
  • Trim to 5" x 5" squares.
Edges - make 4 identical blocks
Gather 4, off white squares and 4 yellow rectangles


On the right side of off white squares
 mark 3/8" from the bottom of each square on the sides.


Mark 3/16" on either side of the top center of each square.


Draw a line connecting each lower edge marking with the nearest top marking.


These lines mark the edge to which you align the yellow fabric.


Align yellow fabric, right sides together,  so that the fabric falls to the larger side of the square.
There will be bunny ears sticking out beyond the edges of the square.
Sew 1/4" from  the line you aligned with.


Iron yellow up and over edge of square.


Trim extra yellow fabric along the longest axis.
Use this scrap to add triangle to the other side.


Align yellow fabric, right sides together,
  so that the larger end is at the larger end of the triangle you are going to cover on the background.

There will be bunny ears sticking out beyond the edges of the square.

Sew 1/4" from the line you aligned with.


Iron yellow flap open.


Making sure that there is 1/4" of yellow beyond the intersection of the two triangles,
Trim piece to 5" x 5" square.

Repeat to make 4, 5"x5" edges

Assemble Block:

  • Gather 9, 5" blocks (4 corners, 4 edges, 1 center)
  • Arrange corners so that the yellow corner patch is in the position closest to the center block.
  • Arrange edges so that the yellow triangles meet beside the center block.  The off white triangles should be pointing toward the center.
  • Sew blocks together to make three rows.
    • Rows 1 & 3: corner block with yellow corner in lower right, edge block with off white triangle pointing down, corner block with yellow corner in lower left.
    • Row 2: Edge block with off white triangle pointing to the right, center block, edge block with off white triangle pointing to the left.
  • Sew rows together to make block.
  • Trim to 14" square.


This is a sample of what 12 blocks would look like.  This quilt would measure 43.5" x 57".

Each month there are 30 kits up for grabs at the general meeting of the Frisco Quilt Guild.  Use a kit, make a block, and return it at the next general meeting to be eligible to win all of the blocks created and any kits that were not made.  The winner is randomly selected from those eligible.