Friday, May 22, 2015

Spoolin' Around


In all fairness, I found this block in Keepsake Quilting's recent catalog.  I have no idea how they make it, but I thought it would be a fun block to try with a group. So I drew it up my way. I think it will be adorable done with scraps.


General Description:
The Quilt

  • Measures 59 x 71 as described
  • Is made of 20, 12" finished blocks arranged in a 4 x 5 grid
  • Has two borders.
    • Inner border measures 1 1/2" finished.
    • Outer border measures 4" finished
The Block
  • Measures 12" finished (12 1/2" x 12 1/2" is the actual measurement before incorporation into the quilt.
  • Is 16 patch construction - all half square triangles and squares

FQG: Angie is providing blue for the accent fabric.  She asks that we use brown for the spool, off-white for the background and brights or multi-color for the thread. 


Cutting Directions:

  • Background (grey)
    • 2, 3 1/2" x 3 1/2" squares (outer corners)
    • 5, 4" x 4" squares (for Half Square Triangles, HSTs)
  • Accent (aqua)
    • 2, 3 1/2" x 3 1/2" squares (outer corners)
    • 2, 4" x 4" squares (HSTs)
  • Spool (brown)
    • 3, 4" x 4" squares (HSTs)
  • Thread (pink)
    • 2, 4" x 4" squares (HSTs)

Sewing Directions:
  • Using your favorite method make the following HSTs, trim units to 3 1/2" square
    • Gather:
      • 5, 4" x 4" background squares
      • 2, 4" x 4" accent squares
      • 3, 4" x 4" spool squares
      • 2, 4" x 4" thread squares
    • 4, background/accent
    • 4, background/spool
    • 2, background/thread
    • 2, spool/thread
Accent Corner

  • Accent Corners:
    • Gather
      • 2, 3 1/2" x 3 1/2" background squares
      • 4, 3 1/2" x 3 1/2" background/accent HSTs
      • 2, 3 1/2" x 3 1/2" background/thread HSTs
    • Arrange units to match the Accent Corner drawing - make two corner units
    • Sew together
    • Pop and spin centers
    • Trim units to 6 1/2" x 6 1/2" squares
Spool Corner
  • Spool Corners:
    • Gather
      • 2, 3 1/2" x 3 1/2" accent squares
      • 4, 3 1/2" x 3 1/2" background/spool HSTs
      • 2, 3 1/2" x 3 1/2" spool/thread HSTs
    • Arrange units to match the Spool Corner drawing - make two corner units
    • Sew together
    • Pop and spin centers
    • Trim units to 6 1/2" x 6 1/2" squares
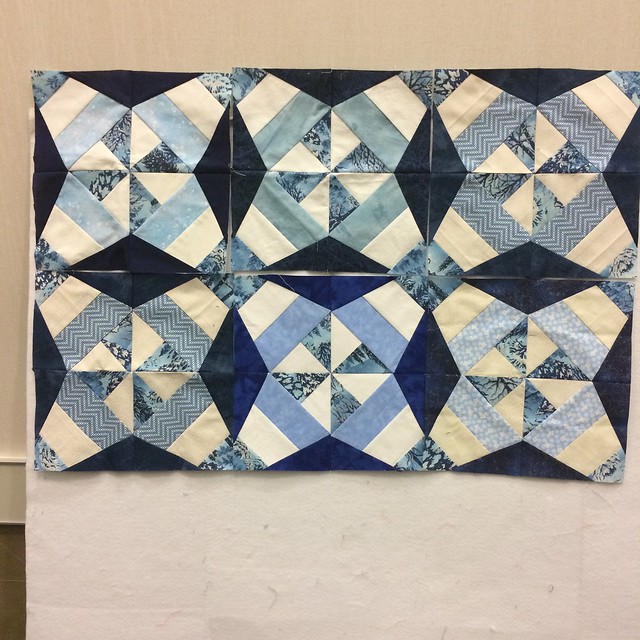
Spoolin' Around Block
  • Make block
    • Gather
      • 2, Accent Corner units
      • 2, Spool Corner units
    • Arrange units to match the Spoolin' Around block drawing
    • Sew together
    • Pop and spin centers
    • Finished block should measure 12 1/2" x 12 1/2"
FQG: Return your finished block(s) to Angies by June 23rd, or bring it to the guild meeting on that night to be eligible to win all of the blocks.

Tuesday, May 12, 2015

Photo finish!

There is still time for a photo finish!


You have two weeks from today 
to get back on track to finishing your block.


Monday, April 27, 2015

Quilty Train - April 2015 - Jumpin' the Tracks!

Jumpin' the Tracks!
(a.k.a. Disappearing Hourglass Block)

Sometimes it is better to jump ship in mid course than to continue on.  I think this is one of those times.

For the past several months we have been playing with paper pieced blocks.  My friends at the guild have been very patient with me, indulging my fascination with the process.  However, it is drawing close to the end of the year, and they deserve a treat.

I've been toting this project around with me for a little over a year.  Each time I drag it out of the box at a retreat people swarm the design wall and ooooh and ahhh over the blocks.  Each time I tell them how easy the block is to make, and they refuse to believe me....until I show them.  Now it is time for me to show you!


General Description:
The Quilt:
  • Measures 52 1/2"x 59 1/4" as described
  • Is made from 42, 6 3/4" finished blocks arranged in a 6 x 7 grid.
  • Has 2 borders
    • Inner border is 1" finished
    • Outer border is 5" finished
The Block:
  • Measures 6 3/4" finished (is actually 7 1/4" x 7 1/4" before incorporation into the quilt
  • This is a disappearing block! It starts out as a four patch and ends up as a nine patch.
  • This block is addicting!  You will love making them (at least I do) but be warned, you have to keep your wits about you while you are trimming.
FQG: Angie will be providing half of the fabric, you need to supply the contrasting fabric.  Please make it a pale solid that coordinates with the kit fabric. Think high contrast!


Are you ready for some fun!!  Let's get started.


Cutting directions:
  • Color 1 - 1, 10" x 10" square
  • Color 2 - 1, 10" x 10" square
Oh that was hard - maybe you need a break?  No?!  I didn't think so.

This block doesn't start out with many pieces; however trimming as you go is paramount.  Don't skip these steps or it will not work.

Sewing Directions:
  • Gather 2, 10" x 10" squares
  • Draw an X from corner to corner on the wrong side of one of the squares.
  • Sew 1/4" on both sides of both lines of the X.....like you are making half square triangles in both directions.
  • Iron flat.
  • Cut into 4, 5" x 5" squares. (along red lines)

  • Cut squares in half along lines to make 8 half square triangles.
  • Iron seams open
  • Trim resulting blocks to 4 1/2" x 4 1/2" 
  • Make two hour glass blocks - follow the picture.
  • Pop seam allowances and twirl.
  • Iron flat.
  • Trim hour glass blocks
    • The blocks should measure 8 1/2" x 8 1/2" before you trim them.
    • We need it to be 8 1/4" x 8 1/4"  BUT it needs to be centered.  BE SURE to trim 1/8" from each side of the block to get the desired size, else it won't work right in the end.
    • Yes, you are cutting away the seam allowance. It will be okay.
  • Cut each hour glass block in to 9, 2 3/4" x 2 3/4" pieces.


  • Rearrange pieces.
    • Keeping the pieces oriented as is, swap corners along the diagonals. You should now have tiny triangles on the outside corners.
    • Keeping the pieces oriented as is, swap edge pieces along the center axis.  You two colored angle should now point towards the center instead of away from it.
  • Being careful to keep the pieces arranged this way, sew them together to make your blocks. You will have two identical blocks.
FQG - Return your finished blocks to Angie by May 26th, 2015 or bring them to the meeting on that night to be eligible to win all of the blocks.

Same blocks, alternate arrangement.


Tuesday, March 10, 2015

I'm not lion....


We need your block to finish the FQG block of the month project for March.

You have two weeks from today to get it done!


Don't make me send Dad to pick it up.

Monday, February 23, 2015

Quilty Train - March 2015 - In Like a Lion


In Like a Lion

It took a long time to come up with a name for this block that I was happy with.  I see pinwheels.  I see chevrons.  I see a Greek cross.  I feel the wind moving - that is probably the pinwheels tugging at me again. "In Like a Lion" seems to touch on all of those thoughts. This little guy agrees with me....


especially when I changed the colors to reflect the season.


March in North Texas is all wind and rain and sunshine as the winds fight to figure out who will win and we wait for the seasons to sort themselves out. The warm south winds always win, but it takes a little convincing on their part.

General Description:
The Quilt:

  • Measures 62" x 86" as described.
  • Is made of 24, 12" finished blocks arranged in a 4 x 6 grid.
  • Has 2 borders
    • Inner border is 1" finished
    • Outer border is 6" finished
The Block:
  • Measures 12" finished (is actually 12 1/2" x 12 1/2" before incorporation into the quilt.)
  • 4 patch construction - all four patches are the same
  • Paper pieced - if you have been following along, paper piecing should no longer be a big deal to you.  Just in case it still scares you please refer to my tutorial.  I promise the process is not that hard.  If you would like additional help let me know.  I'd be glad to host a workshop.
FQG: Angie will be supplying fabric for the patterned green (outer pinwheel) in this quilt.  You need to supply White (solid or tone on tone is acceptable), Light grey (solid or tone on tone is acceptable), and a rainbow hued solid of your choice (not green).

Kit fabric
The guild version of the block will look something like this....


Cutting Directions:
  • Paper
    • You need 1 copy of this file to make the block.
    • The link will print all four patches of the block - all identical other than their labels - and will require 4 pieces of paper. (One for each patch)
    • There are four sections to each patch.  These will print together on the same page.
    • Make sure that the pattern measures 4 1/2" along the dotted lines of the square.  You should see the dotted lines 1/4" beyond the last solid line outlining the square. If the pattern you print does not measure 4 1/2" you will need to fiddle with the shrink/enlarge feature of your printer to get it to the correct size.
    • Trim excess paper from the pattern.  I leave 1/4" beyond the dotted lines to make sure there is enough excess to trim the units squarely once it is all pieced.
  • White (20 pieces)
    • Outer pinwheel
      • pieces #A1, E1, I1, and M1
      • cut 4, 4 3/4" x 2 3/4"
    • Lone triangle
      • pieces #A3, E3, I3 and M3
      • cut 4, 6" x 3 1/2"
    • Outer chevron
      • pieces #B1, C1, F1, G1, J1, K1, N1, and O1
      • cut 8, 3 1/2" x 2 1/4"
    • Inner pinwheel
      • pieces #D2, H2, L2, and P2
      • cut 4, 4 3/4" x 2 3/4"
  • Grey (8 pieces)
    • Inner chevron
      • pieces #B2, C2, F2, G2, J2, K2, N2, and O2
      • cut 8, 5" x 2 1/4"
  • Patterned Green (4 pieces)
    • Outer pinwheel
      • pieces #A2, E2, I2, and M2
      • cut 4, 4 3/4" x 2 3/4"
  • Bright solid (4 pieces)
    • Inner pinwheel
      • pieces #D1, H1, L1, and P1
      • cut 4, 4 3/4" x 2 3/4"


Sewing Directions:
  • Follow the paper pattern and piece as directed.
  • Use my tutorial for a refresher if you need one.
  • Combine pieces to make patches
    • A+B+C+D = upper left patch
    • E+F+G+H = upper right patch
    • I+J+K+L = lower right patch
    • M+N+O+P = lower left patch
  • Arrange patches in a 2 x 2 grid so that you have a bright pinwheel on point in the center of your block.
  • Sew patches together to make block.
  • Pop seams and iron in a spiral.
  • Remove papers.
FQG  - Return your finished blocks to Angie by March 24th, 2015 or bring it to the meeting on that night to be eligible to win all of the blocks.

Tuesday, February 10, 2015

A moment of refreshment....

Take a moment to share
 an ice cold Coke with your sweet heart.

  (Valentines day is on Saturday, February 14)


Then get to work on your block of the month. 

 You have two weeks from today to get it done.


Wednesday, January 28, 2015

And the winner is.....


Recently Added-121

Tami Beltran!

Congratulations to Tami on her win of 
7 finished blocks
12 kits & 5 outstanding kits

Monday, January 26, 2015

Quilty Train - February 2015 - Breezy


As we face a brand new year, unblemished and filled with possibilities, the blocks in our series become simpler.  This month's offering, Breezy, takes a step back from the hustle and bustle that was the holiday season and simplifies.

I imagine that the block could be made without paper piecing, but now that you have learned a new skill I can't for the life of me figure out why we shouldn't go right on using it.


General Description:
The Quilt
  • Measures 62" x 86" as described.
  • Is made of 24, 12" finished blocks arranged in a 4 x 6 grid.
  • Has 2 borders
    • Inner border is 1" finished
    • Outer border is 6" finished
The Block:
  • Measures 12" finished (is actually 12 1/2" x 12 1/2" before incorporation into the quilt.)
  • 4 patch construction - all four patches are the same.
  • Paper pieced - if you have been following along, paper piecing should no longer be a big deal to you.  Just in case it still scares you please check out my tutorial.  I promise the process is not that hard.  If you would like additional help let me know.  I'd be glad to host a workshop.


FQG: Angie will be supplying fabric for the white of the pinwheels.  Check it out!


This is going to be a fun and breezy...er bubbly... new project for the new year. You add "Coca Cola" red, and coke brown for the other half of the pinwheels, and pale blue (to match the background of the kit fabric) for the lattice bars.

FQG blocks will look like this...


Cutting Directions: 

 The colors listed below reference the photo of the finished quilt posted above the General Descriptions.
  • Paper -
    • You will need 1 copy of this file to make the block. This link will print all four quadrants of the block - each is the same, other than it is lables.
    • Make sure that the pattern measures 6 1/2" along the dotted lines...you should see them 1/4" beyond the last solid line outlining the big squares.  If the pattern you print is not 6 1/2" x 6 1/2" you will need to fiddle with the shrink/enlarge feature of your printer to get it the correct size. 
    • Trim the excess paper from the pattern - I leave 1/4" beyond the dotted line  to make sure there is enough excess to trim the units squarely once it is all pieced.
  • Red - (FQG - red)
    • piece #A, B, C, and  D 1 - cut 4, 4 3/4"  X  2 3/4"
  • Blue - (FQG - brown)
    • piece # E, F, G, and H 2 - cut 4, 4 3/4" X  2 3/4"
  • White - 
    • for pinwheels (FQG kit fabric)
      • piece #A, B, C, and D 2 - cut 4, 4 3/4" X  2 3/4"
      • piece #E, F, G, and H 1 - cut 4, 4 3/4" X  2 3/4"
    • for lattice bars (FQG pale blue/matching background of kit fabric)
      • piece #E, F, G, and H 3 - cut 4, 9 1/2" X  3 3/4"

Sewing Directions:
  • Follow the paper pattern and piece as directed.
  • Use my tutorial for a refresher if you need one.
  • Make each paper section.
  • Attach sections  to make 4 identical patches
    • A to E
    • B to F
    • C to G
    • D to H
  • As you make each patch of notice that the dark triangles are parallel to each other, with lattice bars between them.
  • Arrange the patches in a 2 x 2 grid, with sections A, B, C, and D towards the center.  This will create a red pinwheel in the center.  You should have a pinwheel on point in the enter of your block.
  • Sew the patches together.
  • Pop seams and iron in a spiral
  • Remove papers.
FQG - Return your finished blocks to Angie by February 24th, 2015, or bring it to the meeting on that night to be eligible to win all of the blocks.  Your new quilt might look something like this....


Tuesday, January 13, 2015

Slidding into 2015


Now that we have the holiday season well behind us it is time to get back on track.

You have two weeks from today to get your Pinata block done for the Frisco Quilt Guild.