Wednesday, January 28, 2015
Monday, January 26, 2015
Quilty Train - February 2015 - Breezy
As we face a brand new year, unblemished and filled with possibilities, the blocks in our series become simpler. This month's offering, Breezy, takes a step back from the hustle and bustle that was the holiday season and simplifies.
I imagine that the block could be made without paper piecing, but now that you have learned a new skill I can't for the life of me figure out why we shouldn't go right on using it.
General Description:
The Quilt
- Measures 62" x 86" as described.
- Is made of 24, 12" finished blocks arranged in a 4 x 6 grid.
- Has 2 borders
- Inner border is 1" finished
- Outer border is 6" finished
The Block:
- Measures 12" finished (is actually 12 1/2" x 12 1/2" before incorporation into the quilt.)
- 4 patch construction - all four patches are the same.
- Paper pieced - if you have been following along, paper piecing should no longer be a big deal to you. Just in case it still scares you please check out my tutorial. I promise the process is not that hard. If you would like additional help let me know. I'd be glad to host a workshop.
This is going to be a fun and breezy...er bubbly... new project for the new year. You add "Coca Cola" red, and coke brown for the other half of the pinwheels, and pale blue (to match the background of the kit fabric) for the lattice bars.
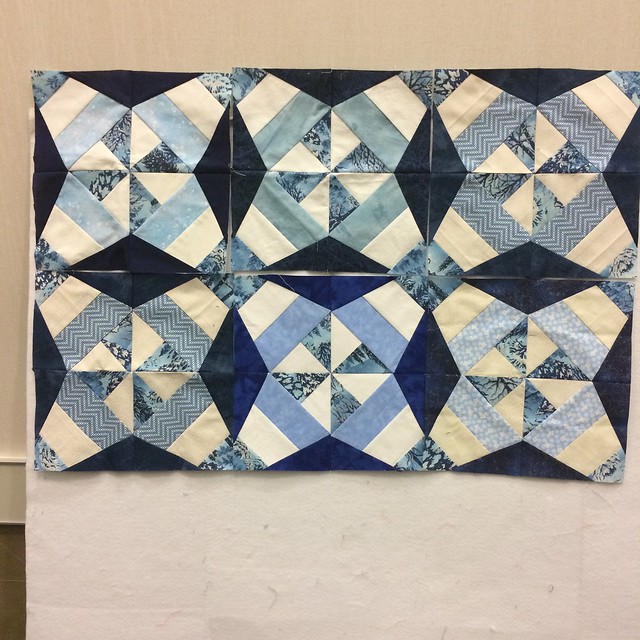
FQG blocks will look like this...
Cutting Directions:
The colors listed below reference the photo of the finished quilt posted above the General Descriptions.
- Paper -
- You will need 1 copy of this file to make the block. This link will print all four quadrants of the block - each is the same, other than it is lables.
- Make sure that the pattern measures 6 1/2" along the dotted lines...you should see them 1/4" beyond the last solid line outlining the big squares. If the pattern you print is not 6 1/2" x 6 1/2" you will need to fiddle with the shrink/enlarge feature of your printer to get it the correct size.
- Trim the excess paper from the pattern - I leave 1/4" beyond the dotted line to make sure there is enough excess to trim the units squarely once it is all pieced.
- Red - (FQG - red)
- piece #A, B, C, and D 1 - cut 4, 4 3/4" X 2 3/4"
- Blue - (FQG - brown)
- piece # E, F, G, and H 2 - cut 4, 4 3/4" X 2 3/4"
- White -
- for pinwheels (FQG kit fabric)
- piece #A, B, C, and D 2 - cut 4, 4 3/4" X 2 3/4"
- piece #E, F, G, and H 1 - cut 4, 4 3/4" X 2 3/4"
- for lattice bars (FQG pale blue/matching background of kit fabric)
- piece #E, F, G, and H 3 - cut 4, 9 1/2" X 3 3/4"
Sewing Directions:
- Follow the paper pattern and piece as directed.
- Use my tutorial for a refresher if you need one.
- Make each paper section.
- Attach sections to make 4 identical patches
- A to E
- B to F
- C to G
- D to H
- As you make each patch of notice that the dark triangles are parallel to each other, with lattice bars between them.
- Arrange the patches in a 2 x 2 grid, with sections A, B, C, and D towards the center. This will create a red pinwheel in the center. You should have a pinwheel on point in the enter of your block.
- Sew the patches together.
- Pop seams and iron in a spiral
- Remove papers.
FQG - Return your finished blocks to Angie by February 24th, 2015, or bring it to the meeting on that night to be eligible to win all of the blocks. Your new quilt might look something like this....
Tuesday, January 13, 2015
Subscribe to:
Comments (Atom)


