Happy Birthday FQG!
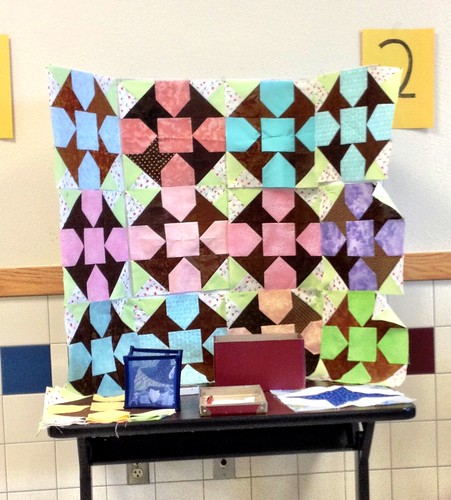
General description of block: This is a classic friendship star block made with Quilty Friends basic corners. It uses nine patch construction.
Cutting directions: (21 pieces)
FQG - this months kit is purposefully subtle. Our pinwheels will not pop as much as they usually do...this will allow our stars to shine. Frisco Quilt Guild is, after all, the friendliest little guild in Texas! Add dark coordinating colors from your stash to make the stars and white or off white for the background.
from dark (floral in kit) -
- Cut 1, 5 1/4 inch square.
- Sub-cut this square diagonally into 4 small triangles.
from light (pale blue in kit) -
Cut 1, 5 1/4 inch square.
- Sub-cut this square diagonally into 4 small triangles.
from background (white or off white) -
- cut 2, 5 1/4 inch squares.
- Sub-cut them on the diagonal into 4 large triangles for corner blocks.
- cut 2, 5 1/4 inch squares for edge blocks
from coordinating (dark blue, green, yellow, etc.)
- cut 2, 5 1/4 inch squares for edge blocks
- cut 1, 4 1/2 inch square for center
Piecing directions:
Corners -

- Sew one dark and one light small triangle together to make one large
triangle.
- Being careful not to warp the triangles, iron seams open.
- Sew each set in the same order. The finished large triangles should be
identical.
- Using the right angle to align the pieces, sew each two colored triangle to
a large single fabric triangle. Trim the excess seam allowance (this should all
be from the large single fabric triangle).
- Being careful not to warp the triangles, iron seams toward the large single
fabric triangle. (The side with the least number of seams) Trim square to 4 ½
inches.
- Make 4 identical squares
Edges - These blocks are the dreaded "half square triangle" you can make these blocks however you want to...however, I've included the directions for those who are new to this block.

- Draw one diagonal line from corner to corner on the wrong side of each 5 1/4" square of background fabric. (You should have 2)
- With right sides together, sew background squares to coordinating squares just shy of 1/4" from the line on both sides of the line. This will result in a square of fabric with two parallel lines of stitching about 1/2" apart running diagonally across the square.
- Cut along the drawn line creating 2 triangle shaped pieces from each square.
- Being careful not to warp the triangles, open the triangles and iron seams toward the darker fabric.
- Trim squares to 4 1/2" inches.
Block - Assemble block according to the picture being careful to make the points of your star go in the right direction. The points on opposite sides of the block should be parallel to each other.

- row 1 & 3 - are the same. Corner square with bisected corner on the outside; middle square with background to the left; corner square with bisected corner on the outside.
- row 2 - Edge square with solid, contrasting corner on upper right; solid center square; edge square with solid, contrasting corner on the lower left.
- Assemble rows to make one 12 1/2" block. (actual size, including seam allowances.)


