Showing posts with label Circle of Quilty Friends. Show all posts

Tuesday, March 12, 2013

Belly Buttons, oooh, oooh Belly Buttons

Are due in two weeks!


DON'T BE THE MISSING BLOCK!


There are 9 kits remaining for members of the Frisco Quilt Guild.
  Call me if you would like to join the fun.

Wednesday, February 27, 2013

And the winner is...

 
Jeanne Caniglia
 
Jeanne went home with 29 finished blocks and a coupon for free quilting from Tops to Treasures.
 
In celebration of the accomplishment a box of chocolates was also distributed.  Marilyn Pitrone was the lucky winner.


Monday, January 21, 2013

CQF Month 8 - February 2013 - Starry Night


General Description of Block: This is a nine patch block, constructed with nine patch blocks in the corners. The edge blocks are constructed of triangles - suggesting a friendship star, plus something more...a conundrum. 

I like the idea of making this quilt as a study in shades of the same color.  I chose black and grey....thus the name Starry Night.

There isn't anything in this block that we haven't already done in this series. It should be easy. 

FQG: Your kit contains fabric for the little black squares in the corners. 

"A New York State of Mind" designed by Maria Kalinowski for Benartex, (# City Lights CM5334.) will create circles that come and go as the whites, greys, and blacks in the pattern are rearranged in our blocks.  The resulting quilt will be a study in the night life - blacks, greys, and whites.

You will need white, black, and two greys to complete this block.


Cutting Directions: (there are 49 pieces, but some will be strip pieced to make it easier.)

  • White
    • 4, 2" x 8" rectangles (for corner blocks)
    • 1, 6 1/4" x 6 1/4" square (for edge blocks)
      • sub-cut twice on the diagonal to create 4 small triangles
  • Black
    • 1, 5" x 5" square (for center block)
  • Medium Grey
    • 2, 6 1/4" x 6 1/4" squares (for edge blocks)
      • sub-cut once on the diagonal to create 4 large triangles
  • Light Grey
    • 2, 2" x 8" rectangles (for corner blocks)
    • 1, 6 1/4" x 6 1/4" square (for edge blocks)
      • sub-cut twice on the diagonal to create 4 small triangles
  • Kit fabric
    • 3, 2" x 8" rectangles

Piecing Directions:


Corners:
  • Sew strip sets:
    • Gather all 2" x 8" rectangles. (You should have 9)
    • Sew 3 sets of 3 as follows
      • grey, white, black
      • white, black, white
      • black, white, grey
    • Iron seam allowances toward the black.  Where black is on the outside of the set, iron seam allowances so that they fall away from the center
  • Cut each strip set into 4, 2" x width of set segments
  • Sew segments together to match picture above.  Make 4.
  • Trim blocks to 5" x 5" squares


Edges:
  • Gather all triangles.  (You should have 12)
  • Sew one white small triangle to one small light grey triangle.
    • Place the white on top as you feed it through your machine right angle first and it will come out correctly.
    • The white triangle  should fall to the left when, with the hypotenuse parallel and closest to you, the patch is pressed open.  Thinking of it as if it were a little pyramid, the left side is white and the right side is light grey.
  • Iron seam allowances open.
  • Align pieced large triange with medium grey large triangle at the right angle.  The medium grey patch will be a bit big.  That is okay.
  • Sew hypotenuse of pieced triangle to hypotenuse of medium grey triangle, 1/4" from edge of pieced triangle.
  • Iron seam allowances towards the medium grey.
  • Trim to 5" X 5" square.
  • Repeat 3 times to make 4

Assemble Block:


  • Gather 8, 5" pieced blocks and 1, 5" black square
  • Arrange patches in front of you so that it resembles the picture above.
  • Sew patches into three rows.
  • Iron seam allowances towards the edge blocks
  • Sew rows together to make block.
  • Iron seam allowances towards the center row.
Bring your completed block(s) to the February 2013 meeting of the Frisco Quilt Guild to be eligible to enter a drawing to receive the whole bundle.   (There are 29 kits available this round...30 finished blocks to be won.)

The finished quilt will look something like this....


Monday, December 17, 2012

CQF Month 7 - January 2013 - Respectible


General Description of Block:  This one will surprise you when it replecates.  The dominant red cross and Jacob's Ladder-esque center dissappear. 

 
Well, the red cross doesn't, but I am thinking that once we scrap-o-late it it will.   (Like that word?  I just made it up.)  What I see is a respectible arrangment of traditional pieced shapes culminating in big bulls eyes.
 
This is a nine patch block, constructed from nine 5 nine patch blocks and 4 squares in a square.
 
 
FQG:  Your kit contains fabric for the black pieces.  Where you see red in my directions substitute any color other than black, or white that you find in the kit fabric.  Where you see white, use white.  Where you see beige use a low volume (LV) or  text print.
 
"Low volume" is a trending phrase at the moment.    At it's simplest, it refers to fabric that is neutral (white, beige, or grey) with a graphic print on it.   Any of the fabrics in the photo below would be an example. 
   
Low Volume Fabrics
 
For our purposes please select a LV fabric that coordinates with the colors in the kit fabric.


Cutting Directions: (61 pieces, but some will be strip pieced to make it easier.)
  • White
    •  3, 2" x 8" rectangles
    • 4, 2" x 2" squares
    • 4, 5" x 5" squares
  • Red
    • 4, 2" x 2" squares
    • 1, 2" x 8" rectangle 
  • Black (Kit fabric)
    • 3, 2" x 8" rectangles
    • 1, 2" x 2" square
  • Beige (LV)
    • 2, 2" x 8" rectangles
    • 16, 2 3/4" x 2 3/4" squares
Sewing Directions:


Center:

 
  • Gather all little squares
    • 4 white,
    • 4 red
    • 1 black
  • Sew 3 sets of 3
    • 2 - white, red, white
    • 1 - red, black, red
  • Iron seam allowances towards the red.
  • Assembles resulting rectangles to make one square as pictured above.
  • Trim to 5" x 5" square
 
Corners:

 
  • Gather all rectangular pieces
    • 1 red
    • 3 white
    • 3 black
    • 2 beige (LV)
  • Sew 3 sets of  3
    • 1 - red, white, black
    • 1 - white, black,  beige (LV)
    • 1 - black, beige (LV), white
  • Iron seam allowances towards the black.  Where black is on the outside edge of the set iron both seam allowances away from the center strip.
  • Cut each set into 4, 2" x 5" rectangles
  • Assemble pieces to make 4 identical squares as pictures above.
  • Trim each square to 5" x 5"
 
Edges:


  • Gather
    • 16, beige (LV) squares
    • 4, white squares
  • Draw one diagonal line on the wrong side of each beige (LV) square.  This is your sewing line.
  • Progressing one corner at a time
    • Aline one beige (LV) square, right sides together, with the corner of a white square so that the drawn line is parallel to the corner.
    • Sew on line.
    • Pressing from the top of your piece, press the beige (LV) square in half towards the outer corner. (There will be 3 pieces of fabric there, leave it that way)
    • Repete 3 times to make 4 white squares with one beige (LV) corner.
    • Repete process with adjacent corner, 4 times to make 4 white squares with 2 beige (LV) corners.
    • Repete process with adjacent corner, 4 times again to make 4 white squares with 3 beige (LV) corners.
    • Repete process with remaining corner, 4 times to make 4 white squares with 4 beige (LV) corners.
    • Trim each square to 5" x 5"
Assemble Block:

Respectable

 
  • Use the picture above to position pieces
  • Iron seam allowances towards the 9 patches.
  • When you assemble the whole block you will need to clip the seam allowances to allow them to lie toward the 9 patch blocks exclusively.  Proceeding in this manner allows you to minimize the amount of bulk in any one spot.
 
This is sort of what it will look like - only more colorful.  the +s and blocks will be all different colors.
 The stars show up better in person than in my photo
 
Bring your completed block(s) to the January metting of the Frisco Quilt Guild, (Tuesday January 22, 2013) to be eligible for the drawing.

I can't wait to see how this one turns out.

Monday, October 15, 2012

A gentle reminder....


You have one week to get your block finished so you can bring it to the October general meeting of the Frisco Quilt Guild and win the bunch.

My block is ready....is yours?

Wednesday, September 26, 2012

And the winner is.....

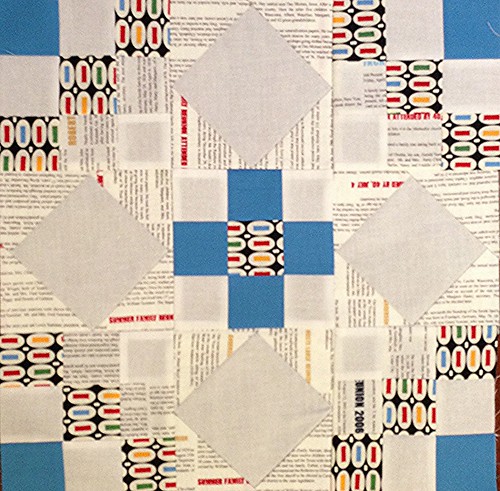
The winner of the September 25, 2012 Frisco Quilt Guild block of the month lotto is

Ginny Miller
Ginny won 14 completed blocks, 5 kits (returned from players who didn't get to it. Well done on that people! I am proud of you), and 2 IOU blocks (completed but not turned in).
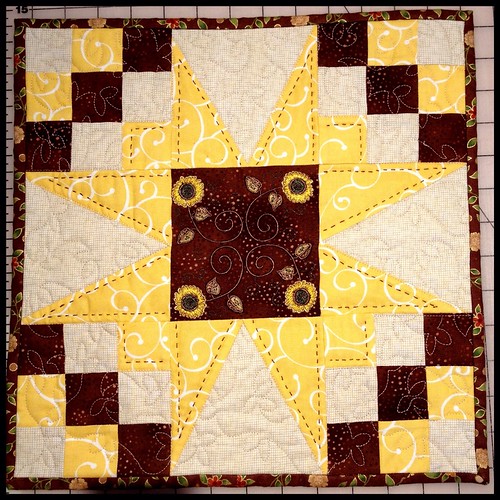
As there was no fabric left over I threw in an extra surprise.....
 
 
....a one block mini. I had to figure out how to make the block, didn't I. Well, this was my test block, embellished with some machine embroidery, and hand quilting.

Ginny also received a coupon good for free labor from Tops to Treasures on any quilt with edge to edge quilting.

~*~*~*~*~*~*~*~*~*~*~*~*~*~*~*~*~*~*~*~*~*~*~*~*~*~*~*~*~*~*~*~*~*~*~*~*~*~*~*~*~*~*~*~*~*~*~*~

In other news check out these items from last night's show and tell.

 
December 2011 lotto winner Vicky Shortino had this to share. I love the throw made from Dancing Tulips.

 
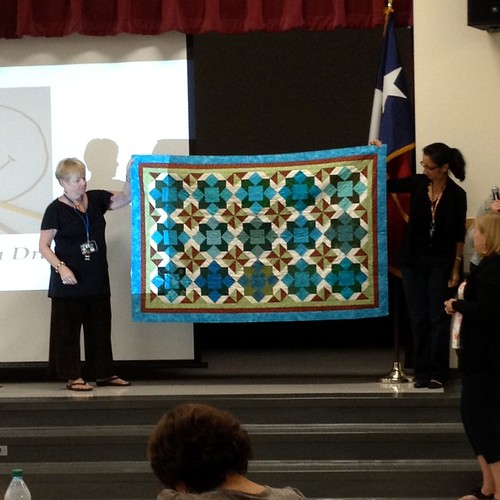
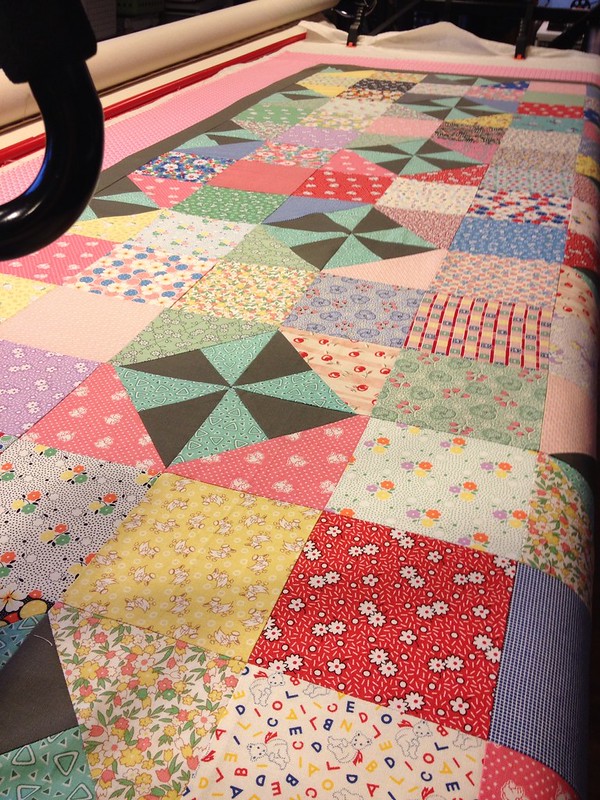
March 2012 winner Marilyn Pitrone had a finished Brain Dead quilt to show us. (This photo is from its time with me getting quilted.)

It was awesome seeing my their quilts finished.

Wednesday, July 25, 2012

And the winner is.....


Carol Bradley!

Congratulations to Carol on her win of 8 blocks, the remaining kits for Olympic Rings, and free labor on quilting for the quilt of her choice.

Kits are still available for our next block....Which Way. Contact me if you are interested in playing.